使用Ktor和Thymeleaf创建Web应用程序 | Baeldung关于Kotlin
使用Ktor和Thymeleaf创建Web应用程序 | Baeldung关于Kotlin
1. 概述
Thymeleaf是一个服务器端Java模板引擎,它既可以在Web环境也可以在非Web环境中工作。Ktor是一个用Kotlin编写的用于构建异步服务器端和客户端应用程序的框架。
在本教程中,我们将使用Thymeleaf和Bootstrap创建一个带有学生名单和成绩报告卡的Web应用程序。
2. 设置依赖项
对于这个应用程序,我们需要使用Gradle添加**Ktor Server Core, Netty, Thymeleaf, 和 StatusPages 依赖项**:
implementation("io.ktor", "ktor-server-core", "2.3.5")
implementation("io.ktor", "ktor-server-netty", "2.3.5")
implementation("io.ktor", "ktor-server-thymeleaf-jvm", "2.3.5")
implementation("io.ktor", "ktor-server-status-pages", "2.3.5")
3. Ktor和Thymeleaf设置
现在我们可以创建我们的 main() 函数:
fun main() {
    embeddedServer(Netty, port = 8080, host = "0.0.0.0") {
    }.start(wait = true)
}
这将在本地主机使用端口8080创建一个Netty服务器。
3.1. 模板解析器
然后,让我们为我们的 Application 创建一个扩展函数:
fun Application.configureTemplating() {
    install(Thymeleaf) {
        setTemplateResolver(ClassLoaderTemplateResolver().apply {
            prefix = "templates/"
            suffix = ".html"
            characterEncoding = "utf-8"
        })
    }
}
这配置了Thymeleaf作为模板解析器,并为我们的HTML文件设置了一个名为“templates”的资源文件夹。
3.2. 路由
我们应用程序的第一个路由是 index.html 页面,我们可以在“/”路由中映射它。这也是 Application 的一个扩展函数:
fun Application.configureRouting() {
    routing {
        get("/") {
            call.respond(ThymeleafContent("index", mapOf("message" to "Hello World")))
        }
    }
}
我们还使用了一个名为“message”的键映射了字符串“Hello World”。这是我们的Ktor/Kotlin代码与UI交互的一种方式。
让我们创建一个名为 index.html 的基本HTML模板,并使用_th:text_ Thymeleaf标签来显示消息。这个文件应该在我们之前配置的 resources/templates 文件夹中。
`<!DOCTYPE html>`
`<html xmlns:th="http://www.thymeleaf.org">`
    ``<head>``
        `<meta charset="UTF-8">`
    ``</head>``
    ````<body>````
        ``<p th:text="${message}" />``
    ```</body>```
`</html>`
现在我们可以在 embbedServer 配置中添加我们创建的两个函数:
fun main() {
    embeddedServer(Netty, port = 8080, host = "0.0.0.0") {
        configureTemplating()
        configureRouting()
    }.start(wait = true)
}
如果我们运行应用程序并在浏览器中访问 http://localhost:8080/,我们应该能够看到“Hello World”消息。
4. 显示学生名单
我们将从显示学生名单开始我们的成绩单应用程序。让我们创建一个 Student 类:
data class Student(
  val id: String,
  val firstName: String,
  val lastName: String
) {
    val fullName: String
        get() = "$firstName $lastName"
}
fullName 属性也可以通过Thymeleaf模板访问。由于我们在这个应用程序中不会使用任何数据库,我们使用一个Kotlin对象来保存我们的数据:
object DataHolder {
    fun getStudentList() = listOf(
        Student(
          id = "1",
          firstName = "Michael",
          lastName = "Smith"
        ),
        Student(
          id = "2",
          firstName = "Mary",
          lastName = "Johnson"
        ),
        Student(
          id = "3",
          firstName = "John",
          lastName = "Doe"
        )
    )
}
现在路由可以调用 DataHolder 对象,并将一个名为 studentList 的键映射到它:
get("/") {
    call.respond(ThymeleafContent("index", mapOf("studentList" to DataHolder.getStudentList())))
}
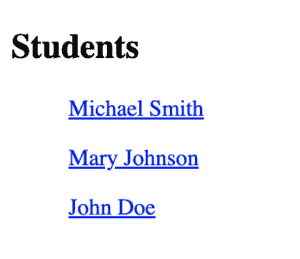
我们可以使用 th:each 标签在 ul 签中迭代学生列表:
```<h2>```Students```</h2>```
`<ul th:each="student : ${studentList}">`
    `<a th:href="@{'report-card/'+${student.id}}" th:text="${student.fullName}" />`
``</ul>``
我们使用 th:href 标签使用学生的id属性重定向到一个新页面。报告卡页面将在下一节中创建。
然后,如果我们运行应用程序,我们可以像这样看到我们的列表显示:
5. 学生成绩的提交表单
我们将使用的表单是用于提交学生成绩的成绩单。所以,首先,让我们创建 GradeValue 枚举:
enum class GradeValue(val displayValue: String) {
    A("A"),
    A_PLUS("A+"),
    A_MINUS("A-"),
    B("B"),
    B_PLUS("B+"),
    B_MINUS("B-"),
    C("C"),
    C_PLUS("C+"),
    C_MINUS("C-"),
    D("D"),
    D_PLUS("D+"),
    D_MINUS("D-"),
    F("F"),
    EMPTY("")
}
然后,让我们使用它来创建一个 Grade 类:
data class Grade (
  val id: String,
  val subject: String,
  var gradeValue: GradeValue? = GradeValue.EMPTY
)
使用 var 而不是 val 对于 value 属性很重要,因为我们将改变它的值。
让我们在 Student 类中添加一个 gradeList 属性:
val gradeList: List`<Grade>`
在 DataHolder 对象中,我们可以创建一个函数:
private fun createGradeList() = listOf(
  Grade(id = "1", subject = "Reading"),
  Grade(id = "2", subject = "Writing"),
  Grade(id = "3", subject = "Science"),
  Grade(id = "4", subject = "Mathematics"),
)
并在我们的列表中的每个学生上使用它:
Student(
  id = "1",
  firstName = "Michael",
  lastName = "Smith",
  gradeList = createGradeList()
)
另外,在 DataHolder 中,让我们为根据其id从列表中获取学生创建一个新函数:
fun findStudentById(id: String?) = getStudentList().first { student -> student.id == id }
5.1. 成绩单路由
让我们为新页面添加一个新路由:
get("/report-card/{id}") {
    call.respond(
      ThymeleafContent("report-card",
        mapOf(
          "student" to DataHolder.findStudentById(call.parameters["id"]),
          "gradeOptionList" to GradeValue.entries
        )
      )
    )
}
在这个路由中,我们使用新函数 findStudentById() 并从路由本身在 call 对象中获取id参数。
5.2. 成绩单页面
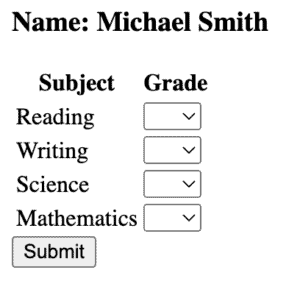
让我们在模板文件夹中创建一个名为 report-card.html 的新HTML页面,并在 <body> 标签内创建一个表单:
``<form action="#" th:action="@{'~/report-card/'+${student.id}}" method="post">``
    ``<h3>``Name: ``<span th:text="${student.fullName}" />````</h3>``
    `<table>`
        ``<thead>``
            ``<tr>``
                ````<th>````Subject````</th>````
                ````<th>````Grade````</th>````
            ````</tr>````
        ``</thead>``
        ``<tbody>``
            ``<tr th:each="grade : ${student.gradeList}">``
                ``<td th:text="${grade.subject}">``````</td>````
                ``<td>``
                    ``<select th:name="${grade.id}">``
                        ``<option th:each="gradeOption : ${gradeOptionList}"
                                th:value="${gradeOption}"
                                th:text="${gradeOption.displayValue}"
                                th:selected="${grade.gradeValue == gradeOption}" />``
                    ``</select>``
                ````</td>````
            ````</tr>````
        ```
        ``</tbody>``
    ``</table>``
    `<button type="submit">`Submit``</button>``
``</form>``
在表单中,我们使用 th:action 处理提交。动作URL中的“~”信号表示我们正在使用服务器相对URL。
在表中使用 th:each 与我们之前使用的列表非常相似,我们可以使用 th:text 显示文本。对于输入,我们使用带有 GradeValue 枚举的选择框选项标签。
要从表中获取值,我们需要使用 th:name 标签。
这是我们的表单的样子:
5.3. 处理表单提交
让我们为 DataHolder 对象中的一个学生更新成绩创建一个函数:
fun updateGrades(studentId: String?, parameters: Parameters) {
    findStudentById(studentId)
      .gradeList.forEach { grade ->
        grade.apply {
            gradeValue = parameters[grade.id]?.let { GradeValue.valueOf(it) }
        }
    }
}
现在,我们可以在一个新路由中使用它来处理表单 POST:
post("/report-card/{id}") {
    val parameters = call.receiveParameters()
    DataHolder.updateGrades(call.parameters["id"], parameters)
    call.respondRedirect("/", false)
}
这个路由更新成绩并将页面重定向到学生名单页面。
6. 错误处理
为了处理我们应用程序中的错误,我们将使用 StatusPages,这是一个 Ktor 插件,用于正确处理异常和状态代码。让我们创建一个扩展函数来配置它:
fun Application.configureStatusPages() {
    install(StatusPages) {
        status(HttpStatusCode.NotFound) { call, _ ->
            call.respond(ThymeleafContent("error404", mapOf("message" to "Sorry! Page was not found.")))
        }
    }
}
状态函数将处理任何404(未找到)状态代码,并将发送到我们的错误页面。让我们创建一个 error404.html 文件,其内容如下:
````<body>````
    ```<h2>```Error```</h2>```
    ``<p th:text="${message}" />``
```</body>```
现在,如果我们尝试访问任何无效路径,我们应该会看到错误页面:

7. Bootstrap
现在我们的应用程序已经可以正常工作了,让我们使用 Bootstrap 和 Thymeleaf 类标签应用一些样式。让我们在 head 标签内添加链接标签:
``<head>``
    `<title>`Students`</title>`
    `<link href="https://cdn.jsdelivr.net/npm/bootstrap@5.3.2/dist/css/bootstrap.min.css"
          rel="stylesheet"
          integrity="sha384-T3c6CoIi6uLrA9TneNEoa7RxnatzjcDSCmG1MXxSR1GAsXEV/Dwwykc2MPK8M2HN"
          crossorigin="anonymous">`
``</head>``
并将脚本标签添加到 body 标签:
````<body>````
    ...
    `<script src="https://cdn.jsdelivr.net/npm/bootstrap@5.3.2/dist/js/bootstrap.bundle.min.js"
            integrity="sha384-C6RzsynM9kWDrMNeT87bh95OGNyZPhcTNXj1NW7RuBCsyN/o0jlpcV8Qyq46cDfL"
            crossorigin="anonymous">``</script>`
```</body>```
这一步对于 index 和 report-card 页面都是相同的。
7.1. 类追加
让我们将列表放在一个带有 container 类的 div 中,并在 ul 标签中添加 list-group 类:
``<div class="container">``
    ```<h2>```Students```</h2>```
    `<ul th:each="student : ${studentList}" class="list-group">`
        `<a th:href="@{'report-card/'+${student.id}}"
           th:text="${student.fullName}"
           th:classappend="${student.hasAllGrades} ? 'list-group-item-success' : 'list-group-item-warning'"
           class="list-group-item list-group-item-action" />`
    ``</ul>``
``</div>``
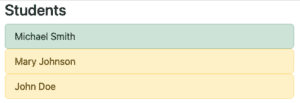
th:classappend 标签可以动态添加类。我们使用它与条件语句一起,如果学生已经获得了所有成绩,就改变颜色线条。让我们在 Student 类中创建这个函数:
val hasAllGrades: Boolean
    get() = gradeList.firstOrNull { grade -> grade.value.isBlank() } == null
这就是我们的列表现在应该看起来的样子:
7.2. 表单样式
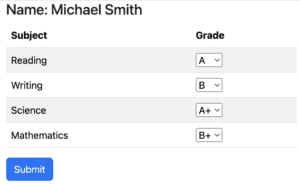
我们可以使用一些 Bootstrap 标签来美化我们的表单和表格:
``<div class="container">``
    ``<form action="#" th:action="@{'~/report-card/'+${student.id}}" method="post">``
        ``<h3>``Name: ``<span th:text="${student.fullName}" />````</h3>``
        `<table class="table table-striped">`
            ``<thead>``
            ``<tr>``
                ````<th>````Subject````</th>````
                ````<th>````Grade````</th>````
            ````</tr>````
            ``</thead>``
            ``<tbody>``
            ``<tr th:each="grade : ${student.gradeList}">``
                ``<td th:text="${grade.subject}">``````</td>````
                ``<td>``
                    ``<select th:name="${grade.id}">``
                        ``<option th:each="gradeOption : ${gradeOptionList}"
                                th:value="${gradeOption}"
                                th:text="${gradeOption.displayValue}"
                                th:selected="${grade.gradeValue == gradeOption}" />``
                    ``</select>``
                ````</td>````
            ````</tr>````
            ``</tbody>``
        ``</table>``
        `<button type="submit" class="btn btn-primary">`Submit``</button>``
    ``</form>``
``</div>``
选择一些成绩后,结果现在应该是:
8. 结论
在本文中,我们使用Ktor应用程序和Thymeleaf UI创建了一个应用程序。我们的应用程序缺乏持久性,可以使用例如 Exposed 库来实现。Thymeleaf是Ktor服务器端渲染模板的良好选择,因为它是一个坚固、知名的模板引擎,并且在Ktor文档中被列为支持的模板引擎。我们还能够轻松地集成Bootstrap,使我们的Web应用程序看起来更加准备就绪。
所有的代码都可以在GitHub上找到。
OK